I hope you are all staying safe and healthy! During this time of social distancing, I am so happy and grateful to be able to continue teaching and sharing the joy of piano with my students! Online lessons have been going great so far! Since online learning is continuing longer than I had originally thought, I am sharing a few tips on how to create an ideal home set up for online piano study.
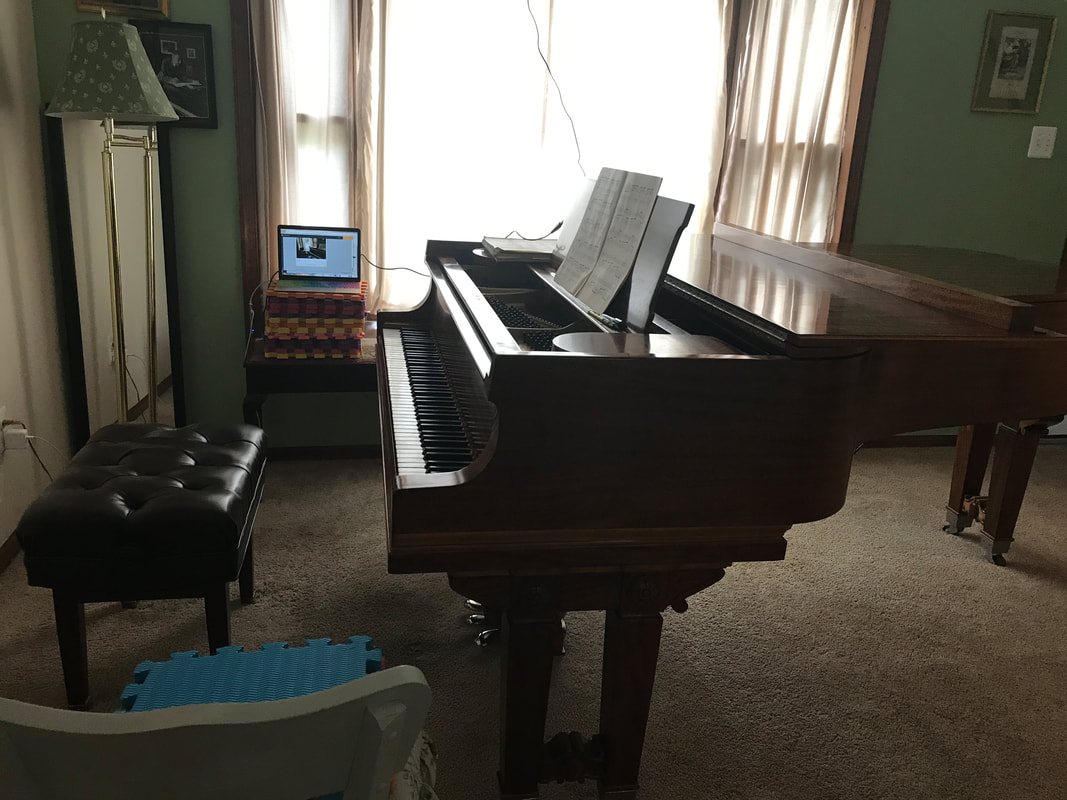
The most common difficulty for students setting up for online lessons at home is setting up the camera or cameras at a good angle so that I can see the student’s fingers, hands, arms, and torso clearly. The most basic setup uses one camera, mounted to one side of the piano and adjusted high enough so that I can see the full keyboard and both hands. A laptop or tablet is ideal, but even a smartphone will work, too! I have attached a couple of pictures of ideal home set ups that some of my students have provided. Thank you to all who have shared pictures! A music stand works well since it is easy to adjust the height and tilt for a different angle, but as you can see below, just about anything with a flat surface will work. Especially if you are using only one camera, it is also helpful to be able to move it to either side of the instrument in case I need to see the hand farthest from the camera in more detail, if possible.
The most common difficulty for students setting up for online lessons at home is setting up the camera or cameras at a good angle so that I can see the student’s fingers, hands, arms, and torso clearly. The most basic setup uses one camera, mounted to one side of the piano and adjusted high enough so that I can see the full keyboard and both hands. A laptop or tablet is ideal, but even a smartphone will work, too! I have attached a couple of pictures of ideal home set ups that some of my students have provided. Thank you to all who have shared pictures! A music stand works well since it is easy to adjust the height and tilt for a different angle, but as you can see below, just about anything with a flat surface will work. Especially if you are using only one camera, it is also helpful to be able to move it to either side of the instrument in case I need to see the hand farthest from the camera in more detail, if possible.
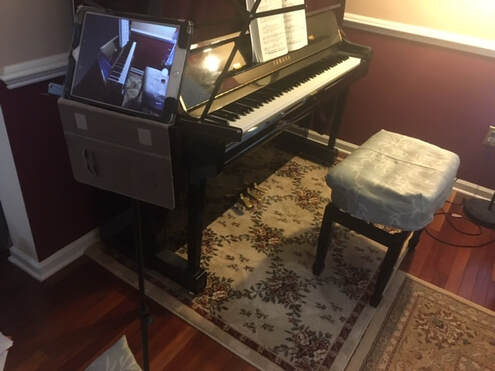
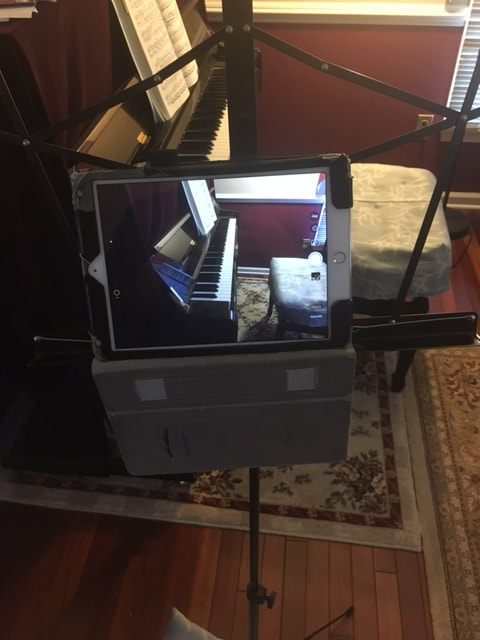
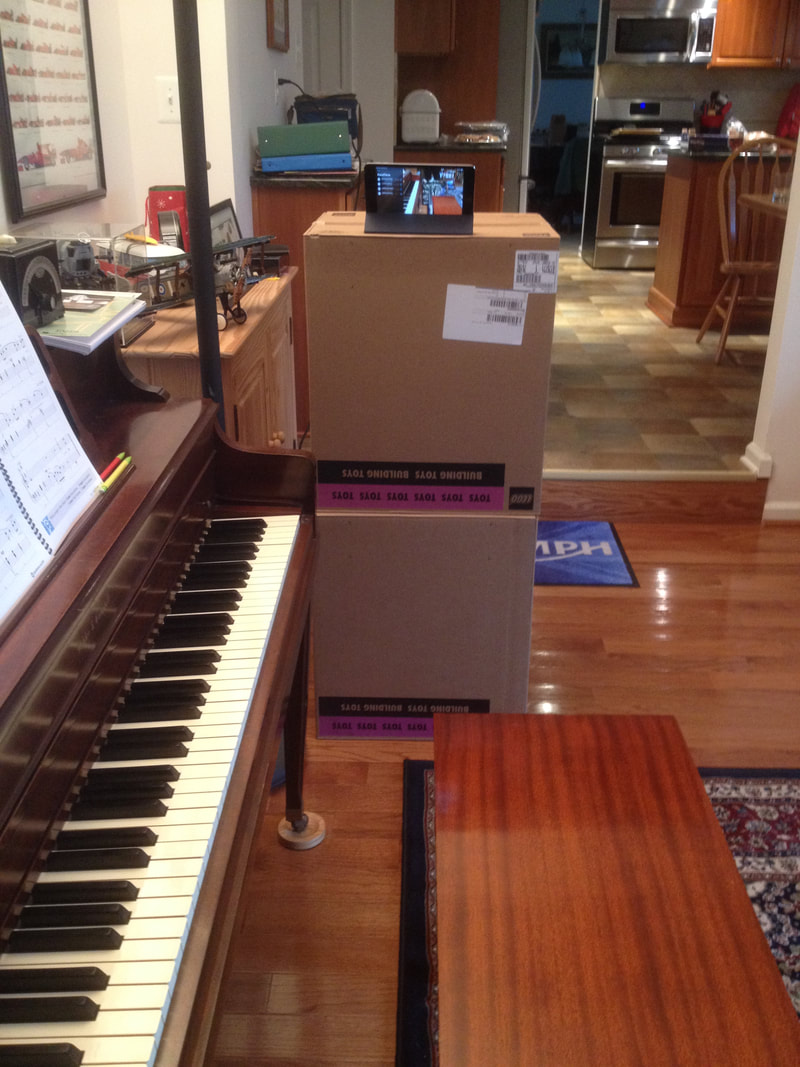
The side-view one-camera set up is easy and works great. However, to optimize your lesson experience, and particularly for long-term online study, adding a second camera to provide an overhead view is very helpful. For students who are professional pianists or are recovering from piano injuries and who are studying online long-term, the overhead camera is essential. For all other students, it is an excellent addition to make to your set up if it is feasible for you. Webcams range in price, but the more inexpensive models are around $30. For an overhead set up, you would need a webcam and something to mount it on. Many students use tripods or microphone boom stands, but other set ups are possible if you have a tall lamp or similar object handy—just be careful that whatever you use won’t fall over when the weight of the camera is added!! Below is an example of one student’s excellent overhead camera set up:
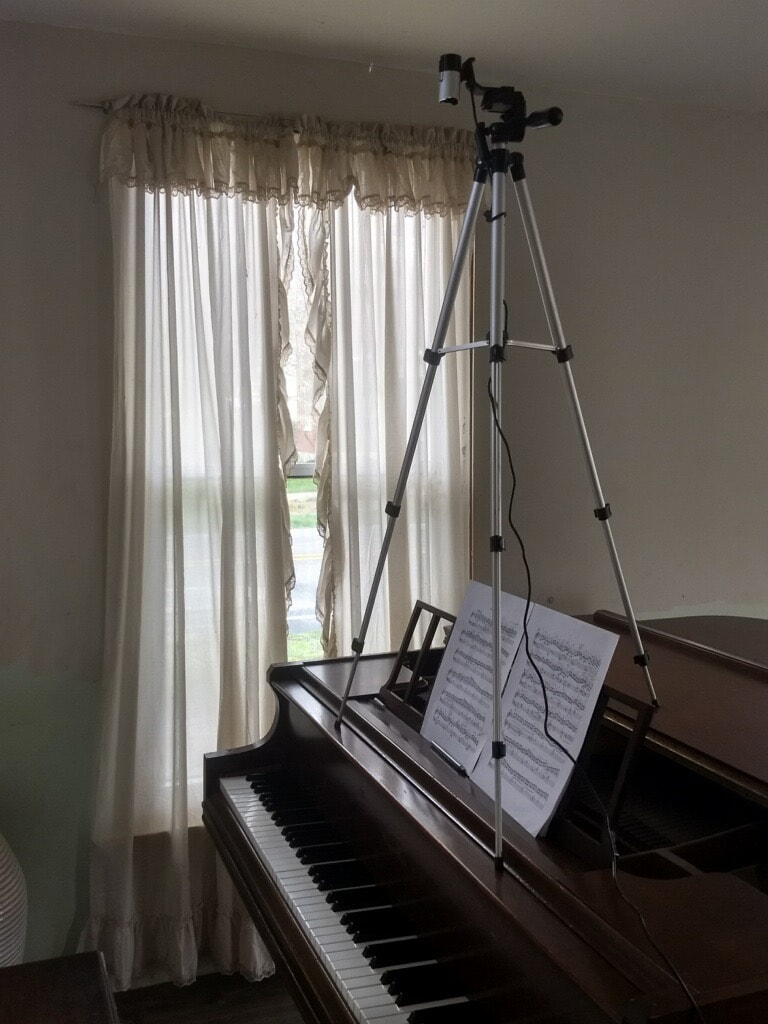
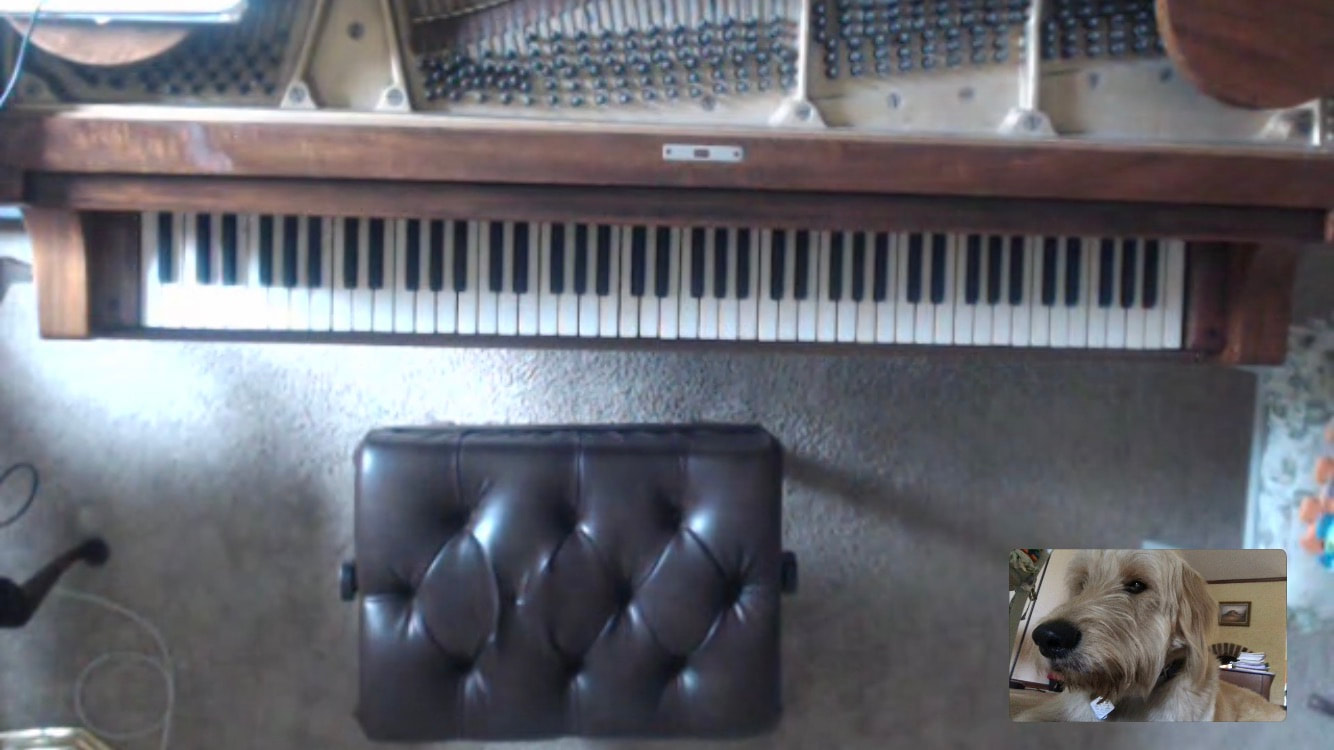
Below is my own set up for online teaching and study. I have a ceiling mounted tripod with a webcam for my overhead camera, since as a teacher I need an overhead view permanently. I mostly use my laptop on one side for the side view, with a spot to move it to the other side of the piano set up also in case I need to show my other hand in detail.
Danny enjoyed helping me prepare my blog post:
Danny enjoyed helping me prepare my blog post:

Here is my overhead view, helpful for demonstrating Taubman concepts such as in and out movements to avoid twisting and curling, adjustments of the torso and walking hand and arm, and how to avoid stretching.
Thanks for reading! I will look forward to seeing you online soon!
 RSS Feed